Is your dishwasher leaving a milky film on your glasses? Are your plates still sporting remnants of last night’s dinner? Perhaps you hear a discouraging hum, or worse, complete silence after it fills with water. These are classic signs that your dishwasher’s circulation pump motor, the heart of its cleaning system, may have failed.
Replacing a circulation pump motor is a task that many homeowners can tackle themselves, saving both time and money. At Perfect Appliance Repair, we believe in empowering our customers. While our certified technicians are always ready to provide fast, reliable service across Australia, we’ve created this comprehensive guide for the dedicated DIYer. Follow these expert steps to confidently diagnose, test, and replace your dishwasher’s circulation pump motor and restore your appliance to its perfect working condition.
Is the Circulation Pump Motor Really the Culprit?
Before you start ordering parts, it’s crucial to correctly identify the problem. A dishwasher has two main pumps, and their symptoms can sometimes overlap.
Auditory Symptoms: The most telling sign is the sound the dishwasher makes (or doesn’t make) after filling with water. Instead of the familiar swooshing of spray arms, you might hear a low hum from a motor that is seized or blocked. In other cases, you may hear complete silence, suggesting an electrical failure where the motor isn’t receiving power or has burned out.
Performance Symptoms: The most obvious result of a failed circulation pump is poorly cleaned dishes. If you notice food debris, grease, and residue, especially on the top rack where water pressure is most critical, it’s a strong indicator that water is not being properly circulated. Your cycles may also seem to run for an unusually long time.
Visual Symptoms: While less common for a circulation pump issue, you might notice that water is left pooling at the bottom of the tub, as the circulation and draining systems are interlinked. A definite sign is any visible leaking from underneath the unit, which can be caused by a failed seal in the pump and motor assembly.
Expert Distinction: Circulation Pump vs. Drain Pump
To avoid a misdiagnosis, understand the difference:
Circulation Pump: This is the workhorse of the wash cycle. It takes the water from the bottom of the tub and powerfully forces it through the wash arms and spray arms to clean the dishes. If this fails, your dishes stay dirty.
Drain Pump: This pump’s job is solely to empty the water from the dishwasher at the end of a cycle. If this fails, your primary symptom will be a large amount of standing water that never goes away.
How to Confidently Test Your Pump Motor
If the symptoms above match your situation, it’s time to confirm the failure with two simple tests.
The No-Tool Inspection: Visual and Auditory Checks
Run a Test Cycle: Start a normal wash cycle and listen carefully. You should hear the sound of the water inlet valve filling the tub.
Listen for the Pause: After filling, there is a distinct pause.
The Moment of Truth: Immediately after the pause, you should hear the motor kick on and the sound of water spraying. If you hear a low hum or nothing at all, the circulation pump motor is your prime suspect.
Using a Multimeter for a Continuity Test
This test will confirm if the motor has suffered an electrical failure.
Safety First: Disconnect the dishwasher from its electrical power source at the circuit breaker.
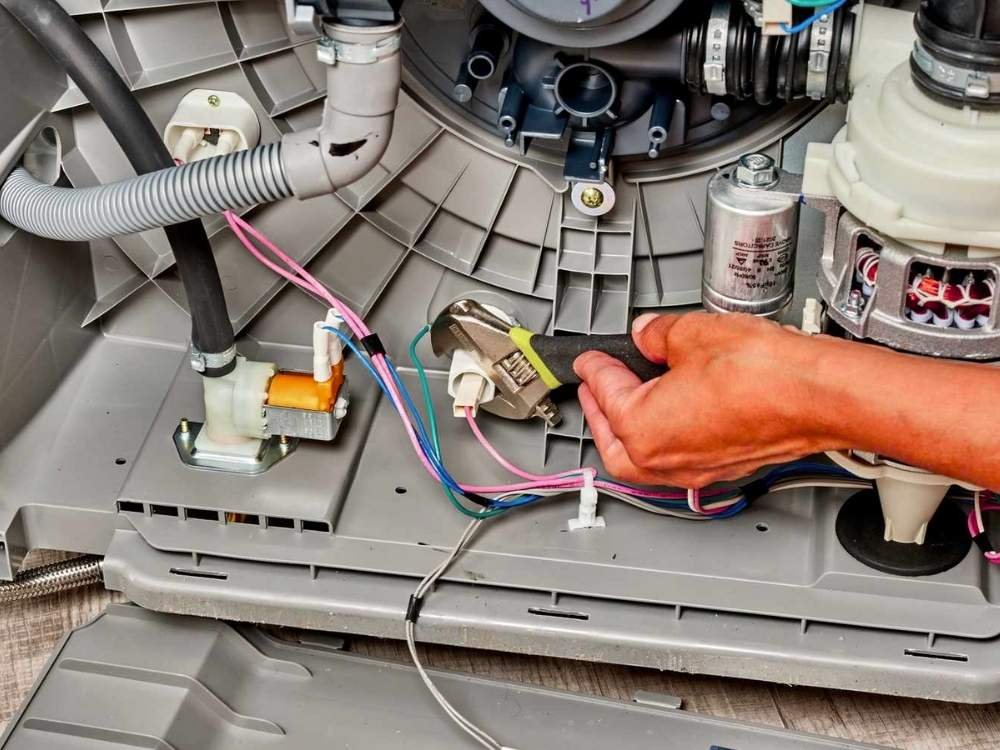
Access the Motor: You will need to pull the dishwasher out and lay it on its back (as detailed in the replacement steps below) to access the motor’s electrical terminals.
Set Your Multimeter: Turn your multimeter to the continuity setting (often marked with a soundwave or diode symbol) or the lowest ohms of resistance setting (Ω).
Disconnect the Wiring Harness: Carefully pull the wiring harness connector off the two terminals on the motor.
Test for Continuity: Touch one multimeter probe to each of the two motor terminals.
Result 1 (Good Continuity): If you get a reading between 15 and 40 ohms and/or the multimeter beeps, the motor’s electrical windings are likely intact. The problem is a mechanical failure, such as seized bearings or an impeller obstruction.
Result 2 (No Continuity): If the multimeter reads infinity (often displayed as “OL”) and does not beep, there is a break in the electrical circuit. The motor has an electrical failure and must be replaced.
Your Pre-Repair Safety and Tools Checklist
A successful repair is a safe and prepared one.
Disconnecting Power and Water
Disconnect Electrical Power: Go to your home’s circuit breaker panel and switch off the breaker dedicated to the dishwasher. Confirm the power is off by trying to turn the dishwasher on. Nothing should happen.
Shut Off Water Supply: Locate the water supply valve, typically under the kitchen sink, and turn it clockwise until it is fully closed.
Assembling Your Toolkit
Phillips & Flathead Screwdrivers
Nut Driver Set (specifically 5/16-inch)
Torx Screwdriver
5/8-inch Open-End Wrench
Channel-lock Pliers
Work Gloves
Safety Glasses
Towels (for spills)
Rinse Aid (for lubricating seals)
New Circulation Pump and Motor Assembly (e.g., Whirlpool part #W11612326)
A Pro Tip from Perfect Appliance Repair
While it’s possible to replace only the motor, we strongly recommend replacing the entire pump and motor assembly. The cost is often very similar, and this approach ensures you are also replacing the impeller, gaskets, and seals, which are common failure points. This prevents future leaks and saves you from having to do a similar repair down the road.
Step-by-Step Dishwasher Pump Replacement Guide
With your diagnosis confirmed and tools ready, it’s time to begin.
Phase 1: Removing the Dishwasher
Clear the Interior: Open the dishwasher and remove both the upper and lower dishracks.
Remove Water Delivery Components: Unclip and remove the bottom spray arm. Release the clips holding the vertical feed tube and remove it from the sump outlet.
Remove Access Panels: Use your nut driver to remove the screws holding the front toe panel and access panel at the bottom of the dishwasher.
Disconnect Lines: Place a towel under the water connections. Use your wrench to disconnect the braided water supply line from the water inlet valve. Disconnect the rubber drain hose from your sink’s drain or garbage disposal.
Disconnect Power: For hard-wired dishwashers, remove the cover from the junction box, photograph the wire connections, and disconnect the house wiring. Unscrew the strain relief nut to release the power cable.
Unsecure and Slide Out: Remove the two screws from the mounting brackets that secure the dishwasher to the countertop. Gently slide the dishwasher straight out of the cabinet.
Phase 2: Accessing and Removing the Old Pump Assembly
Position the Dishwasher: Carefully lay the dishwasher on its back on a towel to protect your floor and the appliance.
Remove the Drain Pump: The drain pump often obstructs access to the circulation pump. Disconnect its wiring harness, use pliers to release the hose clamp, and remove the hose. Press the retaining tab and give the drain pump a 1/4 counter-clockwise turn to release it from the sump housing.
Disconnect All Wires: Disconnect the wiring harnesses from the circulation pump motor, diverter motor, and optical water indicator.
Release the Sump: Tilt the dishwasher upright again. From inside the tub, release the mounting tabs securing the sump assembly.
Remove the Assembly: Carefully open the door, support the base, and lift the entire circulation pump and motor assembly up and out of the tub.
Phase 3: Installing the New Pump and Motor Assembly
Transfer Parts: Move the filter cup and screen from the old assembly to the new one.
Lubricate the Seal: Apply a small amount of rinse aid to the large O-ring seal on the new sump housing. This is a critical step to ensure a perfect, leak-free fit.
Install the New Assembly: Position the new pump and motor assembly into the opening in the tub, aligning the tabs. From underneath, push up firmly until the sump locking tabs snap into place.
Reconnect Components: Lay the dishwasher on its back again. Reconnect the wiring harnesses to the circulation pump, diverter motor, and optical water indicator. Lubricate the drain pump’s O-ring with rinse aid and reinstall it, turning it clockwise to lock it in. Reattach its hose and wiring.
Phase 4: Reinstallation and Finishing Up
Slide Back In: Carefully push the dishwasher back under the counter, guiding the hoses and power cable through. Secure it with the mounting brackets.
Reconnect Utilities: Reconnect the drain hose, water supply line, and electrical connections in the junction box.
Final Assembly: Re-attach the toe and access panels. Inside, reinstall the feed tube, spray arms, and both dishracks.
Testing Your Work and Troubleshooting
The final step is to ensure your repair was a success.
Restore Power and Water: Turn the water supply valve back on fully. Switch the circuit breaker back on.
Run a Test Cycle: Start a short rinse or normal cycle.
Check for Success:
Listen: You should now hear the motor engage and the powerful sound of water spraying through the arms.
Look: Use a flashlight to check all your connection points underneath the dishwasher and sink for any signs of leaks.
Complete a Full Cycle: Let the dishwasher run a full wash cycle to confirm that it cleans effectively and drains properly.
Common Post-Repair Issues
Leaking: The most common cause is a pinched or improperly seated sump gasket/O-ring. You may need to pull the dishwasher back out to readjust it.
Still Not Working: Double-check that all wiring harnesses are snapped in securely.
New Noise: A screw or small object may have fallen into the sump during the repair. You will need to remove the pump assembly again to clear the impeller.
Frequently Asked Questions (FAQ)
How long does it take to replace a dishwasher circulation pump?
For a first-timer, allow 1.5 to 2 hours. An experienced technician can often complete the job in under an hour.What is the average cost to replace a dishwasher pump motor?
The part itself can range from $150 to $300, depending on the model. A professional repair service, including the part and labor, typically ranges from $400 to $600+.Can I just replace the motor instead of the whole pump assembly?
Yes, it is possible on some models. However, we highly recommend replacing the entire assembly to ensure all seals and the impeller are new, providing a more reliable and leak-free long-term repair.What’s the difference between a circulation pump and a drain pump?
The circulation pump sprays water inside the dishwasher to clean dishes. The drain pump removes dirty water out of the dishwasher into your home’s plumbing.
Let the Experts at Perfect Appliance Repair Handle It.
We applaud your DIY spirit! However, we understand that a repair this involved isn’t for everyone. If you’ve read through these steps and would rather have a professional ensure the job is done perfectly and quickly, we are here to help.
Perfect Appliance Repair offers fast, reliable, and guaranteed dishwasher repairs across Australia. Our certified, brand-agnostic technicians can diagnose the issue correctly and replace your pump and motor assembly with precision.
Don’t let dirty dishes pile up. Give us a call or book your repair online today!
Call Us Now: 0414 146 227