There’s nothing more frustrating than pulling a half-cooked roast out of an oven that’s gone cold. When your oven won’t heat up, or isn’t getting hot enough, the most common culprit is a faulty heating element. Whether it’s the bake element at the bottom or the broil element at the top, a failure here can bring your cooking to a grinding halt.
Fortunately, diagnosing and replacing an oven element is a job you can often tackle yourself. This guide provides expert, step-by-step instructions to help you safely test your element, confirm it’s the problem, and get your oven working again. As Sydney’s trusted appliance repair specialists, we at Perfect Appliance Repair believe in empowering homeowners with the right knowledge. Let’s get stuck in.
Your Most Important Step Before Any Repair
This is not optional. Ovens in Australia run on a powerful 240-volt circuit, which is more than enough to cause serious injury or worse. Before you touch a single screw or wire, you must completely cut the power to your appliance.
There are no exceptions to this rule. To do this, you have two options:
- Unplug the Oven: If your oven is a freestanding unit, pull it away from the wall and unplug its power cord directly from the power point.
- Switch Off the Circuit Breaker: For wall ovens or hardwired units, go to your home’s main fuse box (switchboard). Find the circuit labelled “Oven” or “Stove” and flip the switch to the OFF position. To be absolutely certain, try turning on the oven’s cooktop lights or clock—if there’s no power, you’re good to go.
Diagnosing a Faulty Oven Element
This is the investigation phase. Before you order a new part, you need to confirm that the heating element is actually the problem. Here’s how our professional technicians do it.
Telltale Visual Signs of a Dead Element
Sometimes, a faulty element is obvious. With the oven cool and the power off, have a close look at the element in question (either the U-shaped one at the bottom for baking, or the one at the top for broiling). Look for:
- Blisters, Bubbles, or Cracks: Any bubbling or bursting on the element’s metal sheathing is a dead giveaway it has failed.
- Visible Breaks or Holes: Look for a clear split or a small hole in the coil. This is where the element has burned out.
- Uneven Glowing: If you noticed that only part of the element was glowing red when it was last working, that’s another strong indicator of a fault.
Essential Tools for the Job
You don’t need much, but you do need the right gear.
- A Multimeter: This is your most important diagnostic tool. A basic digital multimeter is perfect for the job.
- Screwdriver: A standard Phillips head or flat-head screwdriver will usually be all you need to remove the element.
- Needle-Nose Pliers (Optional): Handy for gripping tight or stubborn wire connectors.
- Safety Gloves: To protect your hands from sharp metal edges inside the oven cavity.
Using a Multimeter for Diagnosis
A visual inspection can be deceiving. A multimeter test is the only way to be 100% certain if the element is faulty. It works by sending a tiny electrical current through the element to measure its resistance.
- Set Your Multimeter: Turn the dial on your multimeter to the ohms (Ω) setting. Choose the lowest range that is above 100 ohms (this setting is often marked as 200 Ω). Before you begin, touch the two probes of your multimeter together. The reading should drop to or near zero. If it does, your multimeter is working correctly.
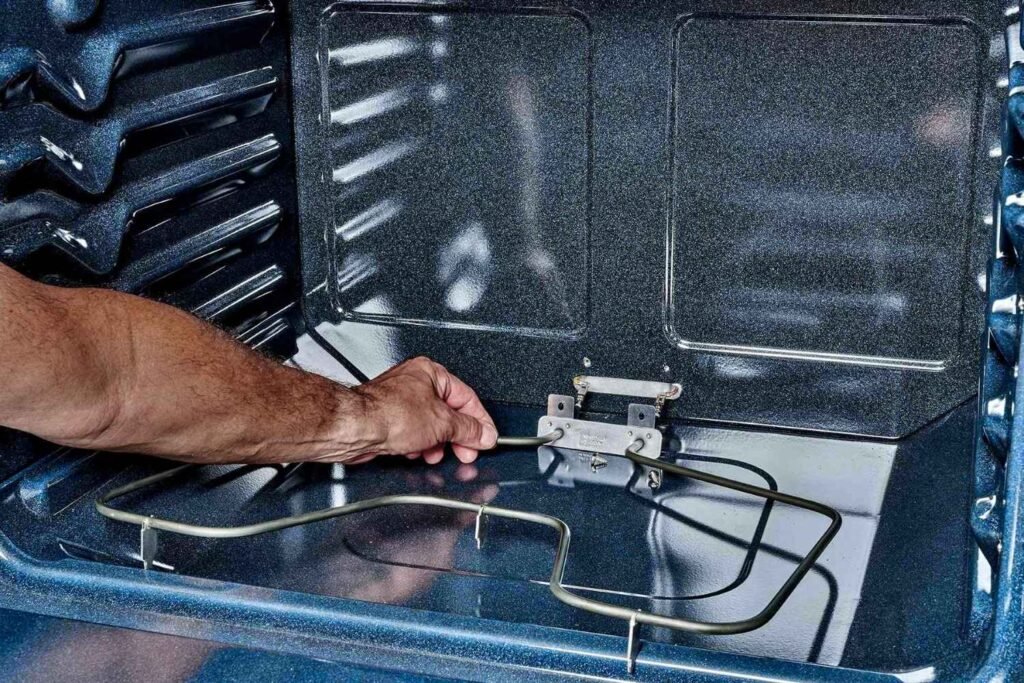
- Access the Terminals: The heating element is held in place by one or two screws at the back wall of the oven interior. Unscrew them and gently pull the element a few inches forward into the oven cavity.
- Disconnect the Wires: You will see two wires connected to the ends (terminals) of the element. Carefully slide these connectors off the terminals. If they are tight, a gentle wiggle with needle-nose pliers can help.
- Test for Continuity: Firmly touch one multimeter probe to each of the two metal terminals on the heating element. It doesn’t matter which probe touches which terminal.
What Your Multimeter is Telling You
The number on your multimeter’s screen will give you a definitive answer.
- GOOD (A Reading Between 15-30 ohms): If your multimeter shows a reading within this range, it means the element has electrical continuity and is working correctly. Your heating problem lies elsewhere (see “When It’s Not the Element” below).
- BAD – Open Circuit (A Reading of “OL” or “1”): If the display reads “OL” (Open Loop), “I,” or simply “1,” it means there is a break inside the element. The electrical current cannot complete its circuit. The element is faulty and must be replaced.
- BAD – Short Circuit (A Reading of Zero): If the reading is 0 or very close to it, this indicates an internal short. The element is faulty and must be replaced.
Pro Tip from Perfect Appliance Repair: Not all elements have the same resistance. A lower-wattage bake element (common in smaller ovens) might have a higher resistance (e.g., 20-30 ohms), while a powerful broil element will have a lower resistance (e.g., 15-20 ohms). As long as your reading is stable and falls roughly within this range, it’s a pass.
Step-by-Step Guide to Replacing the Element
If your diagnosis has confirmed a faulty element, it’s time for the replacement.
Step 1: Finding and Ordering the Correct Part
You must use the correct replacement part for your oven. To find it, you need your oven’s model number. This is usually found on a sticker or metal plate around the oven door frame, on the side of the door, or inside the storage drawer.
Once you have the model number, you can source a genuine, high-quality part. For guaranteed compatibility and durability with Australian brands like Westinghouse, Smeg, Chef, and Blanco, contact Perfect Appliance Repair for Oven Repair . Our team can supply the exact part you need.
Step 2: Removing the Old Bake or Broil Element
With the power OFF, follow these steps:
- Remove all oven racks to give yourself clear access.
- Unscrew the screws holding the element to the back wall of the oven.
- Carefully pull the element forward a few inches until the wire connections are visible.
- Disconnect the wires from the terminals. Take care not to let the wires retract back into the hole in the oven wall.
- If there are any additional support brackets holding the element, unscrew those and remove the old element completely.
Step 3: Installing the New Element
- Take your new element and position it inside the oven.
- Firmly push the wire connectors onto the terminals of the new element. They should slide on snugly.
- Align the element with the screw holes and any support brackets.
- Screw the new element securely into place at the back of the oven.
- Replace the oven racks.
Post-Repair Checks and Confirmation
You’re almost done. This final phase ensures your repair was successful and your oven is safe to use.
Reassembly and the Final Safety Check
Before you restore power, push the oven back into place and ensure any back panels you may have removed are screwed back on. Never operate an appliance with its wiring exposed.
The Moment of Truth: Testing Your New Element
- Restore power by plugging the oven back into the power point or flipping the circuit breaker ON at the fuse box.
- Turn the oven to a bake setting (e.g., 180°C).
- Within a minute, you should see the new element begin to glow evenly across its entire length. This is your visual confirmation of a successful repair.
Expert Tip: To be absolutely certain everything is working as it should, place an oven thermometer inside. Let the oven preheat fully and check if it reaches and holds the set temperature. This confirms your new element is heating correctly and your oven thermostat is properly calibrated.
When It’s Not the Elements
If your element passed the multimeter test but your oven still won’t heat, the problem is more complex. The issue could be:
- Faulty wiring or burned-out connectors leading to the element.
- A defective temperature sensor.
- A malfunctioning oven thermostat or selector switch.
- A blown thermal fuse or a faulty electronic control board.
DIY vs. Calling the Professionals
Knowing when to call in an expert is just as important as knowing how to do a repair yourself.
When DIY is a Great Option
A straightforward element replacement is a great DIY job if the multimeter test is conclusive, you feel confident handling basic tools, and you prioritise all safety steps.
When to Call Perfect Appliance Repair
Don’t risk your safety or further damage to your appliance. If you encounter any of the following, it’s time to call in the professionals:
- You see sparks, smell burning plastic, or are unsure about the oven’s wiring.
- The element tests as good, but the oven still won’t heat up. This points to a more complex electrical issue that requires expert diagnosis.
- You have a gas oven. Gas appliances should only ever be serviced by licensed technicians.
- You simply aren’t comfortable performing the repair.
Our certified technicians at Perfect Appliance Repair have the diagnostic tools and experience to find the fault and fix it right the first time. Schedule your repair today for peace of mind.
Frequently Asked Questions (FAQ)
What should the ohms be on an oven element?
Typically, a functioning oven element in Australia should have a resistance reading between 15 and 30 ohms.
Can an oven element look fine but still be bad?
Absolutely. An element can have an internal break (an open circuit) that isn’t visible from the outside. This is why a multimeter test is essential for a definitive diagnosis.
Why did my oven element spark?
A bright flash or spark often occurs when the element burns out. The internal filament breaks and arcs against the outer metal sheathing, causing a spark. Once this happens, the element is dead and must be replaced.
How much does it cost to replace a bake element in Australia?
The cost depends on the brand and model of your oven. The part itself can range from $50 to over $150. If you hire a professional, you’ll also have a call-out fee and labour charge.
Why does my oven work but the broiler doesn’t?
The bake and broil functions use separate heating elements. If one works and the other doesn’t, it’s a strong indication that the non-working element has failed. Follow the steps in this guide to test the broil element.
Replacing an oven element is a highly satisfying repair that can save you time and money. By following the three key phases Diagnose, Replace, and Test you can tackle this task with confidence. For any jobs that feel too complex or for sourcing genuine parts, remember that your local experts at Perfect Appliance Repair are always here to help.