G’day! There’s nothing more frustrating in the kitchen than getting all your ingredients prepped for a Sunday roast, only to find the oven won’t heat up. Or perhaps you’re trying to boil some water, and all you get is that relentless, mocking click-click-click from the stovetop burner. Fair dinkum, it’s enough to make anyone lose their cool.
The good news is, in most cases, the culprit is a small but mighty component: the igniter. Whether it’s the spark igniter on your cooktop or the hot surface igniter in your oven, this part is the key to getting things fired up.
Here at Perfect Appliance Repair, we believe in empowering Aussie homeowners. This guide will walk you through everything you need to know to safely diagnose, clean, test, and even replace a faulty igniter. We’ll give you the confidence to tackle the job yourself, and the know-how to recognise when it’s time to call in the professionals.
Safety First! A Non-Negotiable Preamble
Before you even think about grabbing a screwdriver, let’s have a serious chat. When it comes to gas appliances, the old “she’ll be right” attitude won’t cut it. Your safety is the top priority.
For any work on your appliance, follow these essential safety steps:
- Disconnect the Power: Unplug the appliance from the wall socket. If you can’t reach it, head to your switchboard and turn off the circuit breaker for your oven.
- Turn Off the Gas: Find the gas shut-off valve, which is usually a small lever located on the gas line behind your appliance. Turn the lever so it is perpendicular (at a 90-degree angle) to the pipe.
Your Toolkit:
- Screwdriver set (Phillips head and flathead)
- Needle-nose pliers
- An old, clean toothbrush and a paperclip
- A multimeter (essential for oven igniter testing)
- Ceramic wire nuts (only if replacing an oven igniter)
- Work gloves
Understanding Your Ignition System
Not all igniters are created equal. Your appliance uses two different types for two different jobs, and knowing the difference is key to a successful fix.
Spark Igniters (Your Cooktop)
- How They Work: When you turn the knob, a component called a spark module sends a high-voltage pulse to the spark electrode next to your burner. This creates a powerful, rapid spark that jumps across to the grounded burner head, igniting the gas. That’s the clicking you hear.
- Signs of Failure: The main giveaway is the sound. Continuous clicking without a flame, a slow or weak spark, or no spark at all points to a problem here. It can also be caused by a cracked ceramic insulator or a faulty connection.
Hot Surface Igniters (Your Oven & Grill)
- How They Work: These are the strong, silent types. A hot surface igniter is a bar made of silicon carbide or a similar material. When you start your oven, electricity flows through it, causing it to glow bright orange or yellow-white and reach temperatures over 1000°C. This intense heat does two things: it ignites the gas, and importantly, it draws enough electrical current (amperage) to signal the gas safety valve to open.
- Signs of Failure: The most deceptive sign is an igniter that still glows but won’t light the oven. This means it’s not getting hot enough to open the gas valve. Other signs include a very slow preheat time, no glow at all, or a visible hairline crack.
Diagnosing the Problem
Let’s pinpoint the issue. Find your symptom below to know where to start looking.
If Your Stovetop Burner is Playing Up:
- Problem: Burner clicks and clicks but won’t light.
- Likely Cause: Clogged burner ports or a dirty spark electrode.
- Problem: Burner doesn’t click at all.
- Likely Cause: A dead igniter, a loose wire, or a failed spark module.
- Problem: The spark looks weak, orange, or yellow (it should be bright white/blue).
- Likely Cause: A dirty or failing spark electrode.
- Problem: One burner works fine, but another doesn’t.
- Likely Cause: The issue is isolated to that specific burner’s igniter or wiring.
If Your Oven or Grill Won’t Light:
- Problem: The oven won’t heat up, but you can see the igniter bar glowing orange.
- Likely Cause: The igniter is weak. It’s glowing but not drawing enough amperage to open the gas valve. It needs replacing.
- Problem: The oven takes ages to preheat.
- Likely Cause: A classic sign of a dying igniter that is slowly failing.
- Problem: The oven shows no signs of life—no glow, no heat.
- Likely Cause: The igniter is completely dead or there’s an electrical fault.
- Problem: You hear a ‘whoosh’ of gas followed by it cutting off, but no flame.
- Likely Cause: The igniter isn’t getting hot enough in time to light the gas before the safety valve shuts off.
The Step-by-Step Repair Guide
Remember: Safety first! Ensure your appliance is unplugged and the gas is off.
Part A – Fixing Your Stovetop Spark Igniter
This is often a simple cleaning job. Give this a go before considering a replacement.
- Access the Igniter: Remove the heavy metal grate over the burner, then lift off the round burner cap. You’ll see the small, white ceramic igniter with its metal tip poking up beside the burner head.
- Clean the Igniter & Burner Ports: Use your dry toothbrush to gently scrub any burnt-on gunk off the metal tip of the spark electrode. Then, take a straightened paperclip or pin and carefully poke out any debris from the small gas ports on the burner head, especially those closest to the igniter.
- Check Alignment & Reassemble: Ensure the burner cap is seated perfectly flat and level on the burner base. If it’s crooked, it can block gas flow to the igniter. Place the grate back on and test it.
If cleaning doesn’t solve it, the issue could be a faulty igniter or spark module, which is a job best left to a professional.
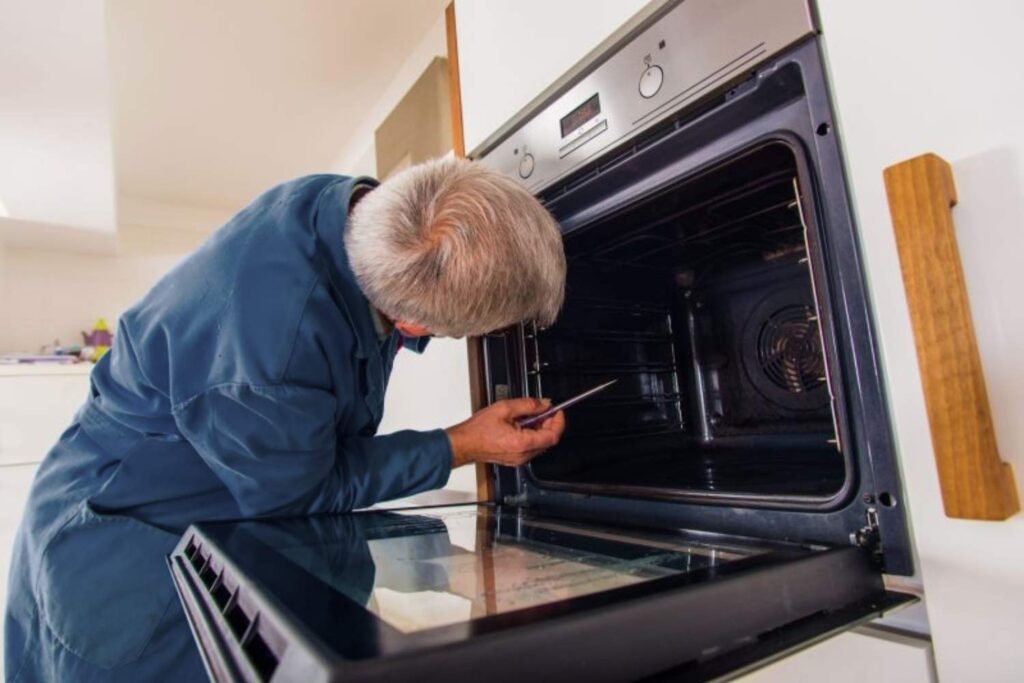
Part B – Fixing Your Oven Hot Surface Igniter
This is a more involved job but very achievable for a confident DIYer.
- Access the Igniter: Remove the oven racks. Locate and unscrew the screws holding the oven’s floor panel (the flat metal sheet at the bottom). Lift it out. You’ll see the long burner tube running front-to-back, with the hot surface igniter attached to it in a metal cage.
- Visual Inspection: Look closely at the dark grey, slightly rough igniter bar. Can you see a fine, hairline crack or a patch that looks chalky and white? If so, it’s knackered.
- The Definitive Test (Using a Multimeter): This is how you confirm a “glowing-but-not-working” igniter is faulty.
- Follow the two wires from the igniter to a plastic connector plug. Disconnect it.
- Set your multimeter to the resistance setting (Ohms, marked with the Ω symbol), usually at the 2k range.
- Touch one multimeter probe to each of the two metal terminals on the igniter side of the plug.
- Read the Results: A healthy igniter (when cold) should have a resistance reading between 100 and 1100 Ohms. If your multimeter reads “OL” (Over Limit/Open Line) or a number wildly outside that range, the igniter is broken and must be replaced.
- Replacing the Faulty Igniter:
- Unscrew the old igniter from its metal bracket. It can be delicate, so be gentle.
- Cut the wires of the old igniter, leaving enough length on the appliance side for splicing.
- Take your new igniter. Do not touch the grey part with your bare hands, as oils from your skin can cause hotspots and premature failure.
- Join the wires from the new igniter to the appliance wires using the special ceramic wire nuts provided. NEVER use standard plastic wire nuts—they will melt.
- Screw the new igniter into place, re-connect the plug, and reassemble your oven in reverse order.
Why Did My Igniter Fail?
Understanding the cause can help prevent future issues.
- End of Lifespan: Like a lightbulb, they are consumable parts that eventually wear out.
- Grease and Grime: A build-up of spills and food debris forces the igniter to work harder, shortening its life.
- Physical Damage: A knock during cleaning or sliding a heavy pan in the oven can cause a hairline crack.
- Power Surges: Electrical fluctuations can be fatal to these sensitive components.
When to Call Perfect Appliance Repair
While many igniter issues are fixable, knowing your limits is crucial for safety.
Give us a bell immediately if:
- You smell gas at ANY stage of your repair.
- You’re not 100% confident with electrical wiring or gas connections.
- After replacing the igniter, the appliance still doesn’t work. This points to a more complex issue, like a faulty gas safety valve or a failed electronic control board.
- You don’t have a multimeter to properly diagnose an oven igniter.
Don’t risk it. Your safety, your home, and your peace of mind are worth it. Our team of licensed and insured technicians at Perfect Appliance Repair have the tools and expertise to diagnose the problem correctly the first time.
Ready for a professional, hassle-free repair?
Frequently Asked Questions (FAQ)
- Q: Why is my gas stove clicking but not lighting?
- A: This is almost always due to a dirty or clogged spark electrode and/or burner ports. Follow the cleaning steps in Section 4A. If that doesn’t work, the spark module might be faulty.
- Q: How much does it cost to replace a gas oven igniter in Australia?
- A: The part itself can range from $50 to over $150 depending on the brand. With a professional service call-out fee and labour, you can typically expect a repair to be in the
- 200−
- 200−
- 400 range, ensuring it’s done safely and correctly.
- Q: My oven igniter is glowing orange. Doesn’t that mean it’s working?
- A: Not necessarily! A common failure is for the igniter to weaken over time. It still glows but can’t draw enough electrical current (amperage) to trigger the gas valve to open. If it glows for more than 90 seconds without ignition, it’s almost certainly faulty.
- Q: Can I repair a cracked igniter with glue or tape?
- A: Absolutely not. Igniters operate at extremely high temperatures. Any attempt at a patch-up job is a serious fire and safety hazard. They must be replaced.