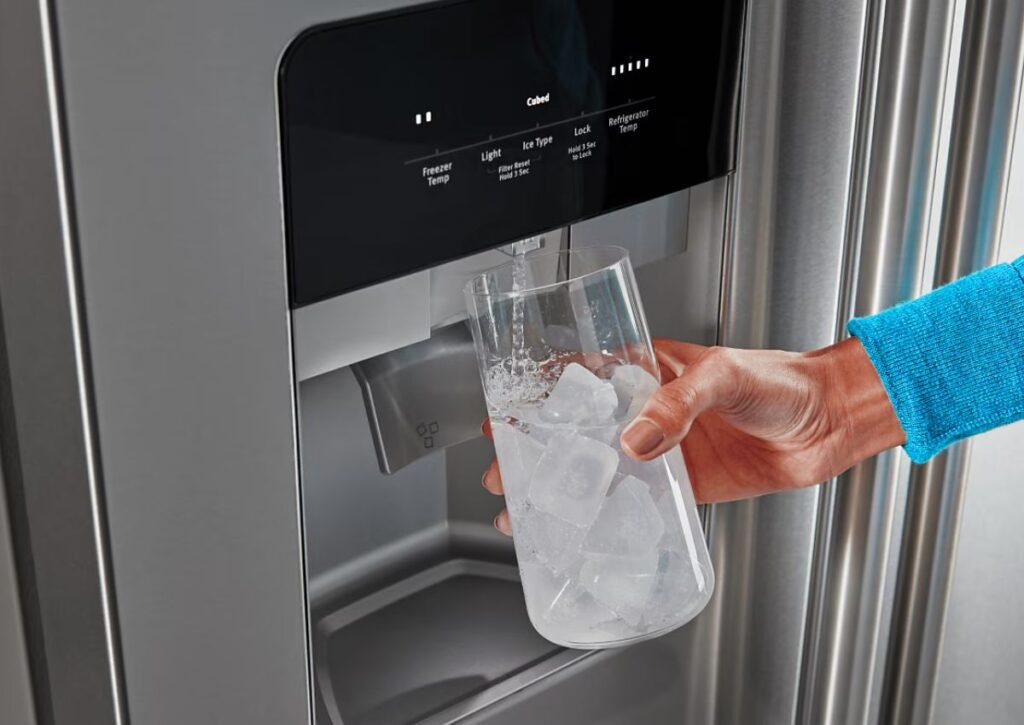
The steady hum of an ice maker and the clatter of fresh cubes dropping into the bin is a sound of modern convenience. Whether for a refreshing drink on a hot day or to soothe a minor injury, having ice on demand is a luxury we often take for granted. That is, until the moment it stops. A silent, non-producing ice maker can be a source of major frustration.
Before you spend hundreds on a professional repair call, know this: many of the most common ice maker problems can be diagnosed and fixed with just a few basic tools and a little guidance. This guide provides simple, step-by-step solutions for the most frequent ice maker issues, empowering you to save time, money, and restore your appliance to perfect working order. This is the most comprehensive and practical guide you’ll find, covering everything from basic mechanics to advanced DIY fixes and preventative maintenance.
Essential Precautions Before You Begin
The first and most critical step in any appliance repair is ensuring your safety. Never begin work without taking these essential precautions:
- Disconnect Power: Unplug the refrigerator from the wall outlet completely. If the plug is inaccessible, go to your home’s circuit breaker panel and switch off the breaker that controls the kitchen or refrigerator.
- Shut Off Water Supply: Locate the small water line running to the back of your refrigerator. Trace it to its source, which is often a small saddle valve attached to your main water pipe under the sink or in the basement. Turn the valve clockwise until it is fully closed.
- Prepare Your Workspace: Spills are inevitable. Lay down towels on the floor around the back of the refrigerator and inside the freezer to absorb any water or melted ice. Ensure your workspace is well-lit, using a flashlight if necessary.
- Required Safety Gear: A good pair of work gloves can protect your hands from sharp edges, and safety glasses are recommended when working near electrical components.
How Your Ice Maker Works
To effectively troubleshoot a problem, you must first understand the mechanism. Demystifying the ice-making process will help you pinpoint exactly where a failure might be occurring.
The Four Stages of the Ice-Making Cycle
Every batch of ice is the result of a precise, automated four-stage cycle:
- Fill Cycle: An electronically controlled water inlet valve opens for a few seconds, allowing water to flow through a tube and fill the ice mold.
- Freezing Cycle: The refrigerator’s cooling system circulates refrigerant around the mold, freezing the water solid. An internal thermostat monitors the mold’s temperature, waiting for it to reach a preset point (typically around 9°F or -13°C).
- Harvest Cycle: Once the thermostat confirms the water is frozen, a small internal heater gently warms the surface of the mold. This allows the cubes to slightly loosen. An ejector blade assembly (or rake) then rotates, pushing the fresh ice cubes out of the mold and into the ice bin below.
- Shut-Off: As the ejector blades return to their home position, a metal feeler arm sweeps over the ice bin. If it detects that the bin is full (by being held in the ‘up’ position by the pile of ice), it signals the ice maker to pause the cycle until more ice is needed. Some modern units use an infrared sensor for this task.
Common Types of Residential Ice Makers
- In-Freezer Ice Makers: The most common variety, these are modular units located inside the freezer compartment of a refrigerator.
- Portable/Countertop Ice Makers: These are standalone appliances that do not connect to a water line; you fill their reservoir with water manually.
- Under-Counter Residential Ice Makers: High-capacity, built-in units often found in kitchens or home bars that produce ice more quickly than standard in-freezer models.
Your Essential DIY Ice Maker Repair Toolkit
Gathering your tools before you start will make the repair process smooth and efficient.
- Essential Tools:
- Phillips and flathead screwdrivers
- Adjustable wrench
- Needle-nose pliers
- Multimeter (essential for testing electrical components like valves and solenoids)
- Helpful Supplies:
- Shop towels or rags
- A bright flashlight
- A small bowl to hold screws and small parts
- A turkey baster or hairdryer (for safely defrosting frozen lines)
- A soft brush (like an old toothbrush) for cleaning
- A cleaning solution of white vinegar and water
Step-by-Step Troubleshooting for Common Ice Maker Problems
This is the core of your DIY repair mission. Identify your symptoms below and follow the structured steps to find your solution.
Problem 1: Ice Maker is Not Making Any Ice
This is the most common failure. Follow this checklist systematically.
- Feeler Arm is Stuck Up:
- Check: Look inside your freezer at the ice maker. If the metal feeler arm is stuck in the ‘up’ position (as if the bin were full), it won’t signal a new cycle.
- Fix: Gently lower the arm. If it’s blocked by a stray ice cube, remove it.
- Water Supply Issue:
- Check: Ensure the shut-off valve is fully open. Inspect the water line behind the fridge for any sharp kinks or visible damage.
- Fix for Frozen Line: If the line feels solid with ice, gently warm it with a hairdryer on a low setting or use a turkey baster to apply warm water to the fill tube area inside the freezer. Never use a heat gun or open flame.
- Clogged Water Filter:
- Check: Most modern refrigerators have a water filter that serves both the water dispenser and the ice maker. If it hasn’t been changed in over six months, it’s likely clogged.
- Fix: Locate the filter (often in the top-right corner of the fridge interior or in the front grille). Twist it counter-clockwise to remove it, and install a new, manufacturer-approved filter. Run a few gallons of water through the dispenser to prime it.
- Faulty Water Inlet Valve:
- Check: This valve, located on the back of the refrigerator, has an electronic solenoid that opens and closes it. You can test it for continuity.
- Fix (Requires Multimeter):
- Unplug the refrigerator.
- Turn off the water supply.
- Locate the valve and carefully disconnect the two wires leading to it.
- Set your multimeter to the continuity setting (often marked with a sound icon). Touch one probe to each of the valve’s terminals.
- You should get a reading between 200 and 500 ohms of resistance. A reading of infinity (often displayed as “OL”) means the solenoid is bad, and the entire valve assembly needs to be replaced.
- Incorrect Freezer Temperature:
- Check: Place a thermometer in your freezer. For the ice maker to cycle correctly, the temperature needs to be stable between 0°F and 5°F (-18°C to -15°C).
- Fix: Adjust your freezer’s thermostat accordingly. If it won’t maintain this temperature, you may have a larger refrigerator issue that needs professional attention.
Problem 2: Ice Cubes are Too Small, Hollow, or Misshapen
This is almost always a water flow issue.
- Low Water Pressure:
- Check & Fix: This is most commonly caused by a clogged water filter (see fix above) or a water supply line that is not fully open. Ensure the valve is turned all the way on.
- Clogged Water Inlet:
- Check & Fix: Mineral deposits can clog the small screen inside the water inlet valve. Turn off the water, disconnect the line from the valve, and use a soft brush to gently clean the screen inside the valve’s inlet port.
Problem 3: Ice Maker is Leaking Water
Water leaks should be addressed immediately to prevent damage.
- Loose Connections:
- Check & Fix: Examine the points where the water line connects to the shut-off valve and the refrigerator’s inlet valve. Using a wrench to gently tighten the compression nuts typically hand-tighten plus one-quarter turn is sufficient.
- Fill Tube Misalignment:
- Check & Fix: Open the freezer and ensure the small white fill tube is correctly positioned above the ice mold’s fill cup. If it’s out of place, it can spill water into the freezer.
- Cracked Ice Mold or Bin:
- Check & Fix: A hairline crack in the ice mold can cause a slow leak during the fill cycle. Visually inspect it. A crack means the ice maker assembly needs to be replaced.
Problem 4: Ice Tastes or Smells Bad
Bad-tasting ice can ruin any beverage.
- Old Water Filter: An old filter fails to remove impurities that cause bad tastes. Replace it immediately.
- Stale Ice & Dirty Bin: Ice is a food product and can absorb freezer odors.
- Fix: Discard all the ice currently in the bin. Remove the bin and wash it thoroughly with warm water and a mild detergent or a solution of white vinegar and water. Rinse and dry it completely before replacing it.
- Food Odor Contamination: Strong-smelling foods like fish or onions can impart their odor to the ice. Ensure all food items in your freezer are in airtight containers or bags.
Problem 5: Ice Maker is Making Loud or Unusual Noises
- Water Hammer (Thumping): A loud thump or bang when the fill cycle ends is caused by the water valve shutting off abruptly. Fix: You can install a small water hammer arrestor on the supply line to absorb the shock.
- Stuck Ice Cubes (Clicking/Grinding): A repetitive clicking sound often means an ice cube is jammed in the ejector mechanism. Fix: Use a plastic utensil to gently dislodge the stuck cube.
- Loose Components (Rattling): Check that the ice maker unit is securely mounted inside the freezer and tighten any loose screws.
Proactive Maintenance
An ounce of prevention is worth a pound of cure. Follow this simple schedule to keep your ice maker running flawlessly.
- Every 3 Months: Empty the ice bin completely, discard any old ice, and wash the bin with a mild soap or vinegar solution to prevent odor buildup.
- Every 6 Months: Replace your refrigerator’s water filter. This is the single most important maintenance step for ensuring good water flow and clean-tasting ice.
- Once a Year: Carefully pull the refrigerator away from the wall. Unplug it and use a vacuum with a brush attachment to clean dust and debris from the condenser coils on the back or underneath. This improves overall cooling efficiency.
When to Call a Professional Repair Service
While many repairs are manageable, some issues require an expert. STOP IMMEDIATELY IF you encounter any of these red flags:
- Refrigerant System Issues: You find an oily residue on components or hear a hissing sound. This indicates a sealed system leak that only a licensed technician can handle.
- Faulty Compressor or Motor: If the core cooling components of the refrigerator are not running, the issue is beyond a simple ice maker repair.
- Complex Electrical Problems: If you’re not comfortable using a multimeter or if tests indicate a failure in the main control board, it’s time to call a pro.
- Persistent Leaks: If you’ve tightened connections and checked components but water is still leaking, a professional can pinpoint the hidden cause without causing water damage.
- If You Are Uncomfortable: If a repair seems too complex or requires forcing parts, stop. It’s always safer and more cost-effective to call a professional than to cause further damage.
Glossary of Common Ice Maker Terms
- Water Inlet Valve: The electronically controlled valve on the back of the fridge that turns the water supply to the ice maker on and off.
- Ice Mold: The tray, often coated with a non-stick material, where water is held to be frozen into cubes.
- Thermostat: The temperature sensor that tells the ice maker when the cubes are fully frozen and ready for harvest.
- Feeler Arm: The metal rod or plastic paddle that detects the ice level in the bin to stop production when it’s full.
- Ejector Blades: A rotating rake-like mechanism that pushes or twists the finished ice cubes out of the mold.
- Solenoid: The electromagnetic coil within the water inlet valve that receives an electrical signal to open the valve.
Conclusion
With a methodical approach and the right information, you have the power to fix most common ice maker issues yourself. By starting with safety, understanding how your appliance works, and following clear troubleshooting steps, you can successfully diagnose and solve problems, saving money and the hassle of a service call. Remember to perform regular maintenance to prevent future breakdowns, and don’t hesitate to call a professional when a repair is outside your comfort zone.
Frequently Asked Questions (FAQ)
- How long does it take for an ice maker to make ice after a reset?
It can take anywhere from 4 to 24 hours to see a full bin of ice after a reset or repair, as the unit needs to complete several full cycles. - Why is my ice maker not dispensing ice even though the bin is full?
This is often an issue with the dispenser mechanism itself. Check for an ice jam in the dispenser chute or a faulty auger motor. - Can I use a universal water filter for my refrigerator?
It’s highly recommended to use the manufacturer-approved filter for your specific model to ensure a proper fit and optimal filtration. - How much does a professional ice maker repair typically cost?
Costs vary, but you can generally expect to pay between $150 and $350 for common repairs, including parts and labor. - Is it more cost-effective to repair or replace my ice maker?
A good rule of thumb is if the repair cost is less than 50% of the price of a new ice maker assembly (or refrigerator, if it’s very old), a repair is worthwhile.